ReachUC Mobility PBX Pane
ReachUC Mobility PBX User Guide
Click on the ![]() icon to go to the ReachUC Mobility PBX pane.
icon to go to the ReachUC Mobility PBX pane.
In this pane, you will see two tabs: Presence and PBX Account
![]()
Presence Tab
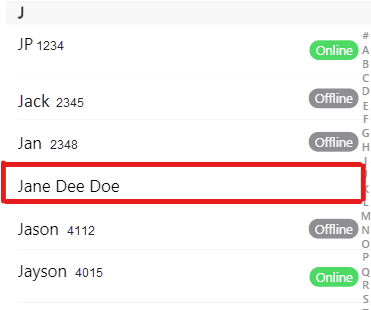
This tab will show all the users in your company’s PBX and their status:
- Online

- Offline

- Busy

Clicking on a contact name will show available actions for that contact. A sample is shown in the image below.

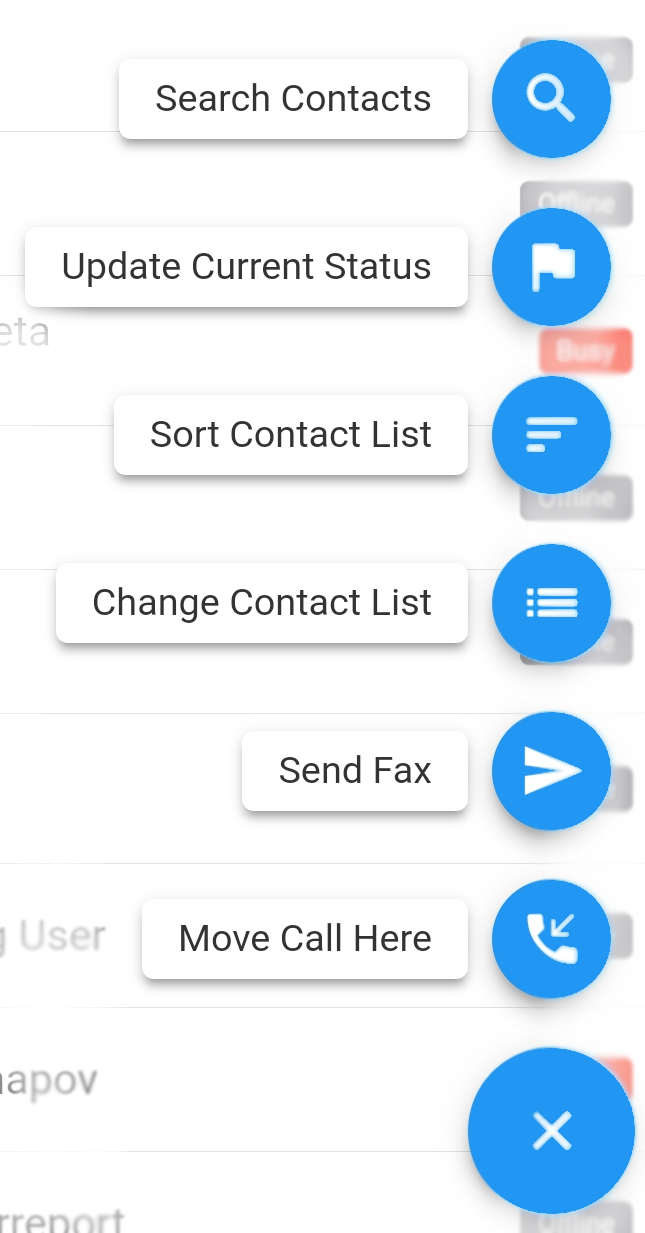
Clicking on the floating button ![]() will reveal the following features for the PBX pane:
will reveal the following features for the PBX pane:
- Search Contacts
- Update Current Status
- Sort Contact List
- Change Contact List
- Send Fax
- Move Call Here
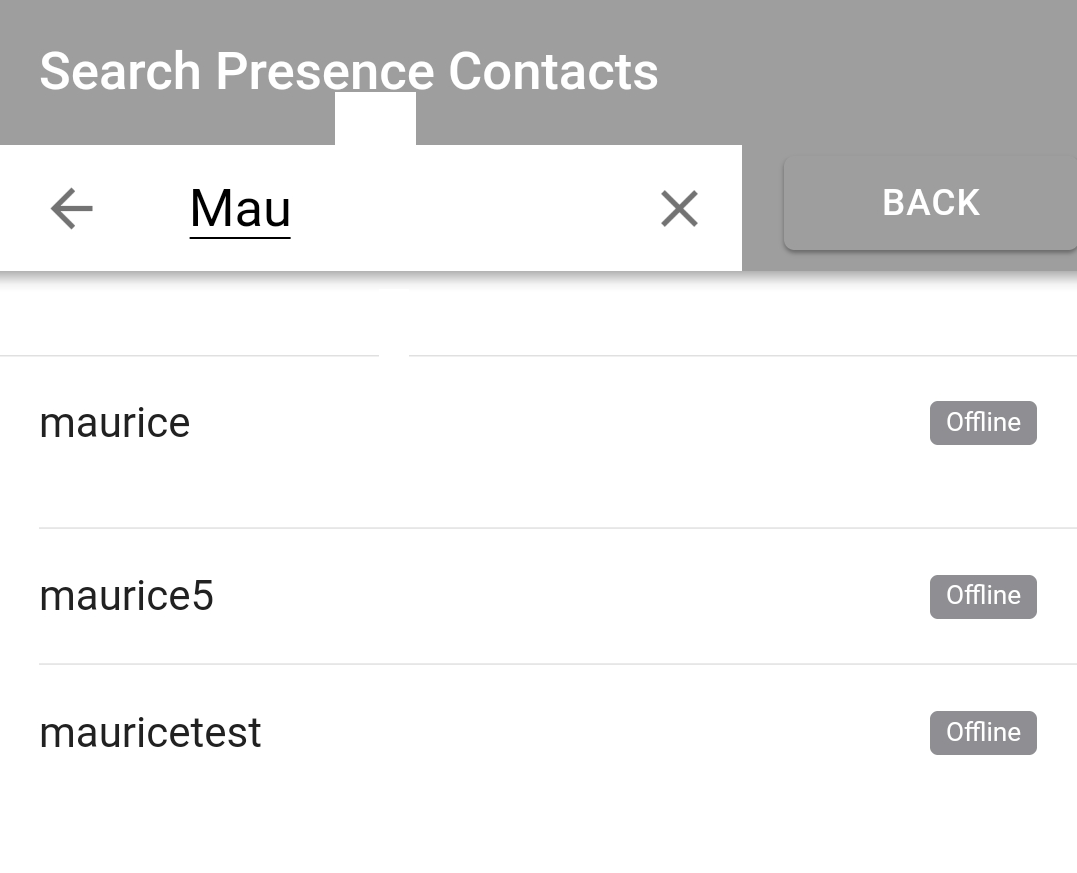
Search Contacts
Returns all contacts that match your given criteria
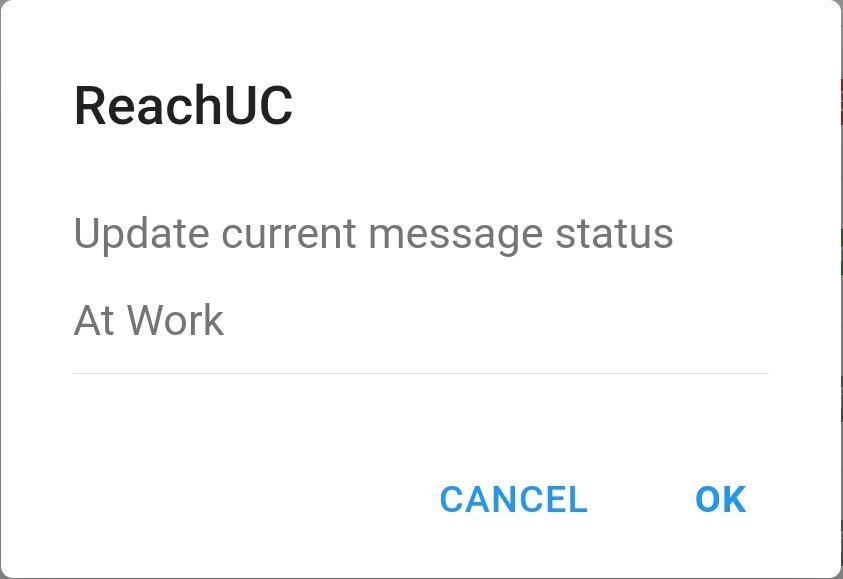
Update Current Status
This lets you change the status text which is visible to all your company’s PBX contacts in their own respective ReachUC applications.

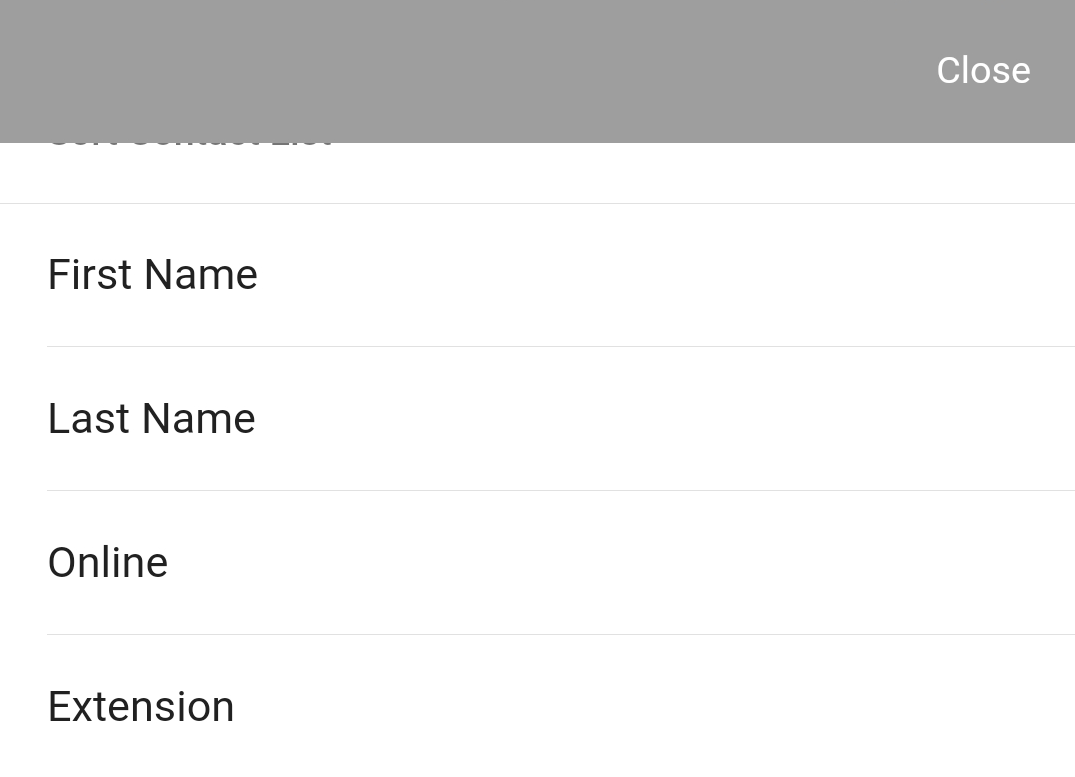
Sort Contact List
This lets you choose to display your contacts sorted (all in ascending order) by
- First Name
- Last Name
- Online (Online first then Busy and last Offline contacts)
- Extension
Change Contact List
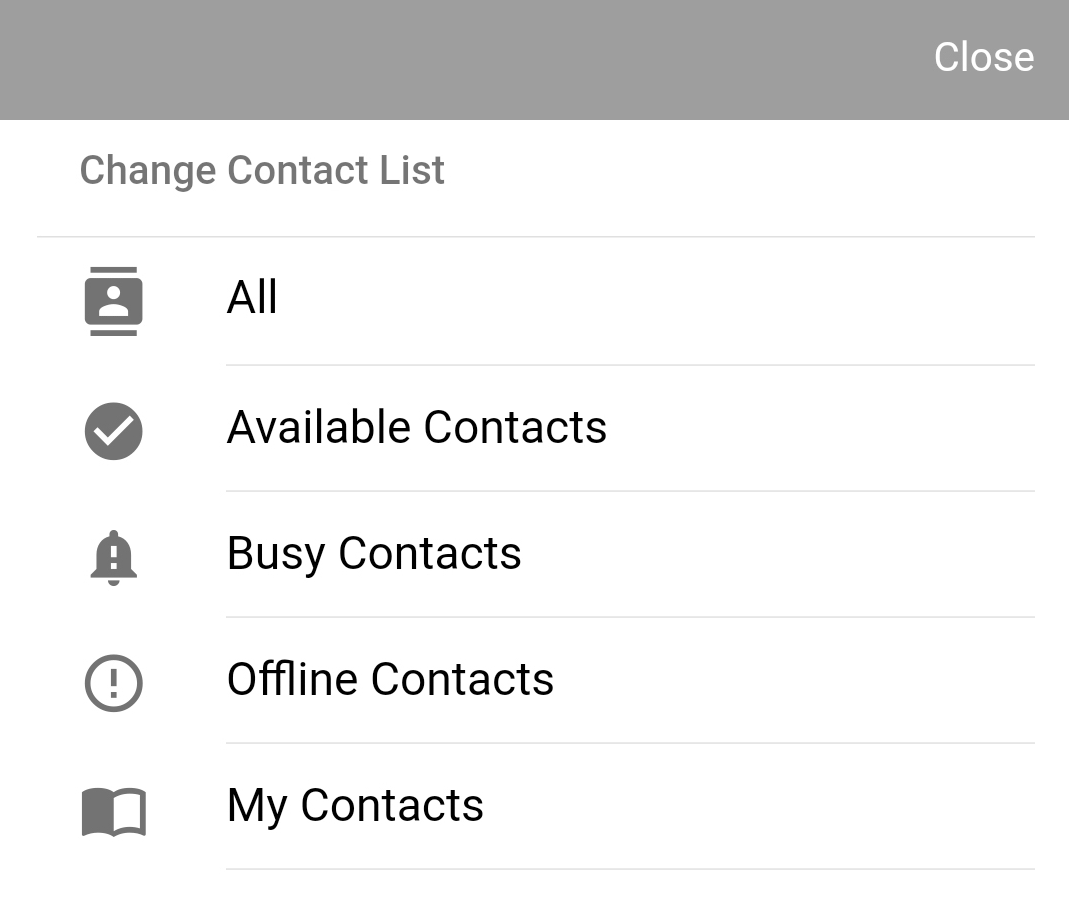
This option lets you choose to filter the contacts shown. The options are listed below:
- All (default) – will show all contacts regardless of status. Note that those without a presence indicator are part of the My Contacts list.
- Available Contacts – will show only those contacts whose status is Online.
- Busy Contacts – will show only those contacts whose status is Busy.
- Offline Contacts – will show only those contacts whose status is Offline.
- My Contacts – will show only the contacts which the ReachUC user has added.
- (Configured Departments in alphabetical order) – will show all contacts from the selected department regardless of their status.
Send Fax
You can send a fax to any number by clicking on the Send Fax floating button.
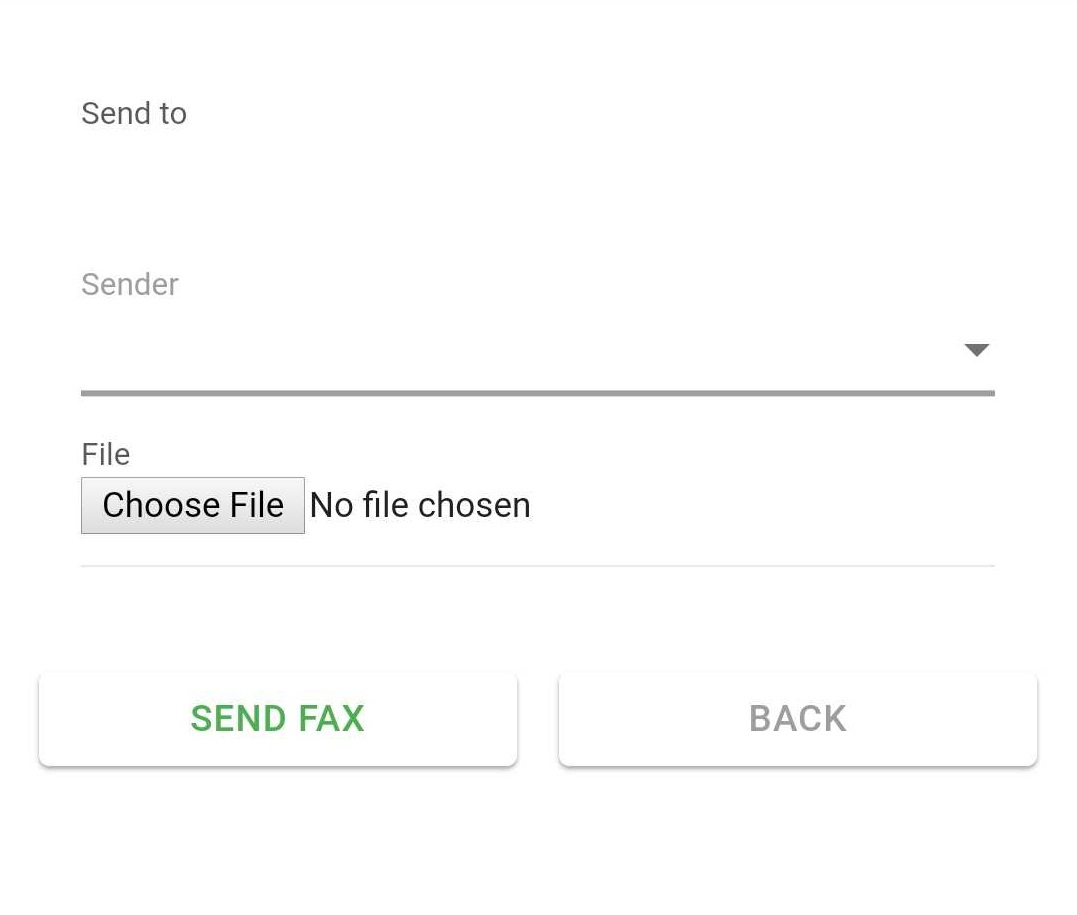
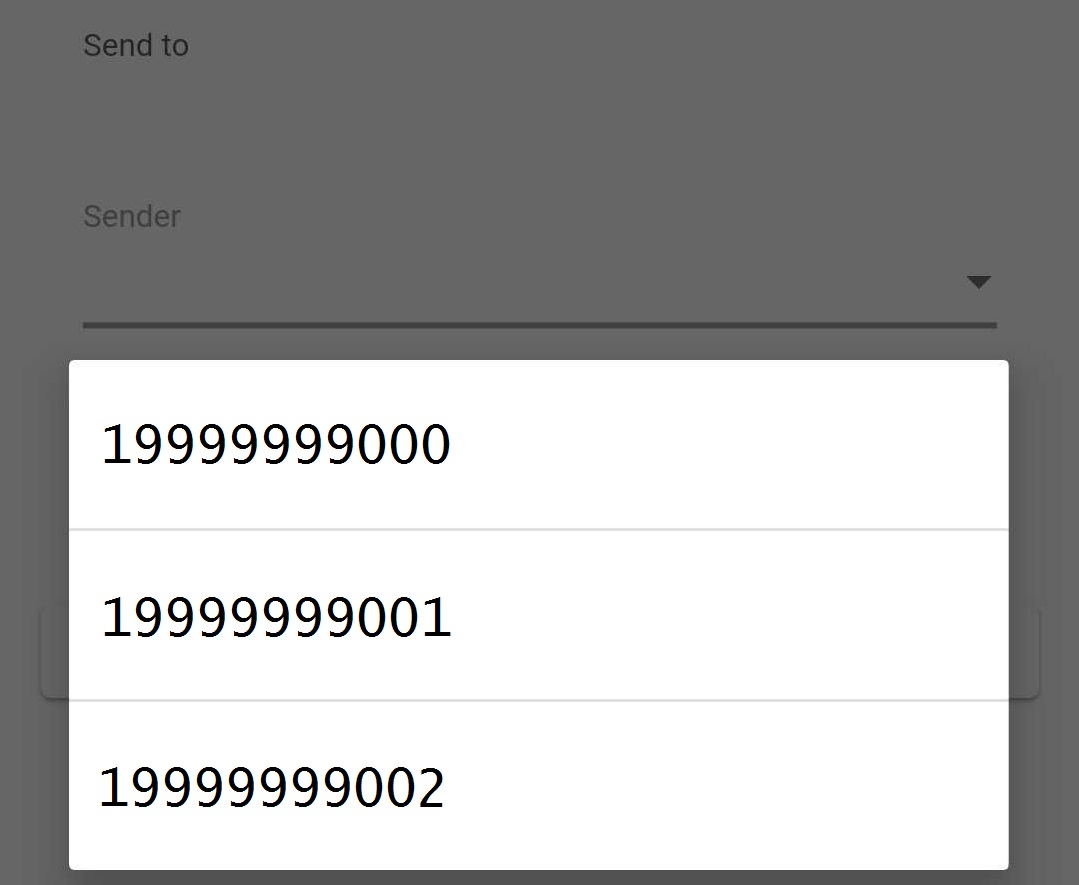
You may then choose a number to use as the sender for the fax by clicking on the drop-down arrow.
Move Call Here
This moves a call existing on your desk phone to the ReachUC Mobility app.
PBX Account Tab
This tab contains information, settings, and tools regarding your ReachUC Mobility account. The tab is divided into four sections:
- PBX Information
- PBX Settings
- Diagnostics
- Downloads
PBX Information
Here you will find data concerning the account:
| 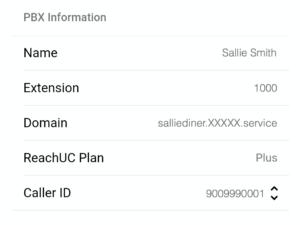 |
The Caller ID for users with “Office Manager” scope and above can be changed if the drop-down ![]() icon is shown (see example above). To change click on the drop-down icon and select a new Caller ID.
icon is shown (see example above). To change click on the drop-down icon and select a new Caller ID.
PBX Settings
This section is where you can see and change settings regarding your account.
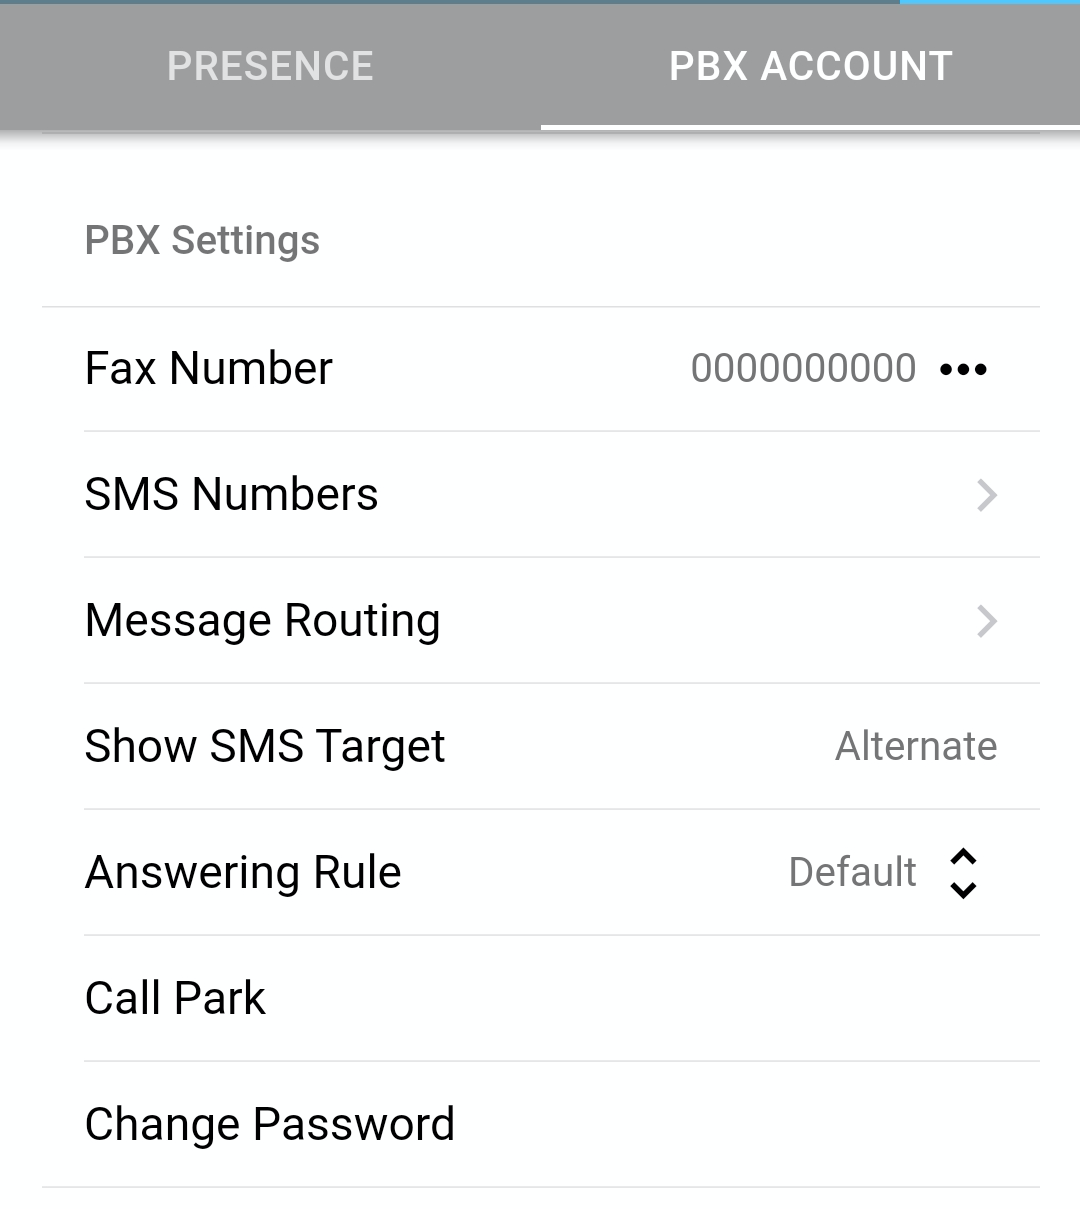
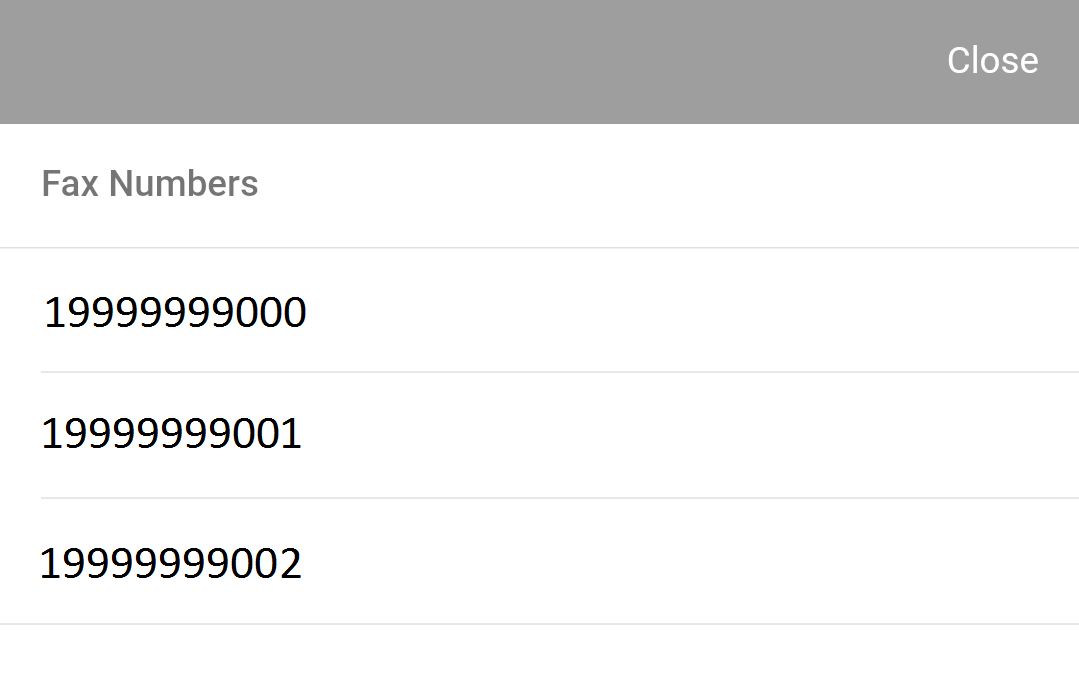
Clicking on the Fax Number line will reveal all the fax numbers associated with your PBX account.
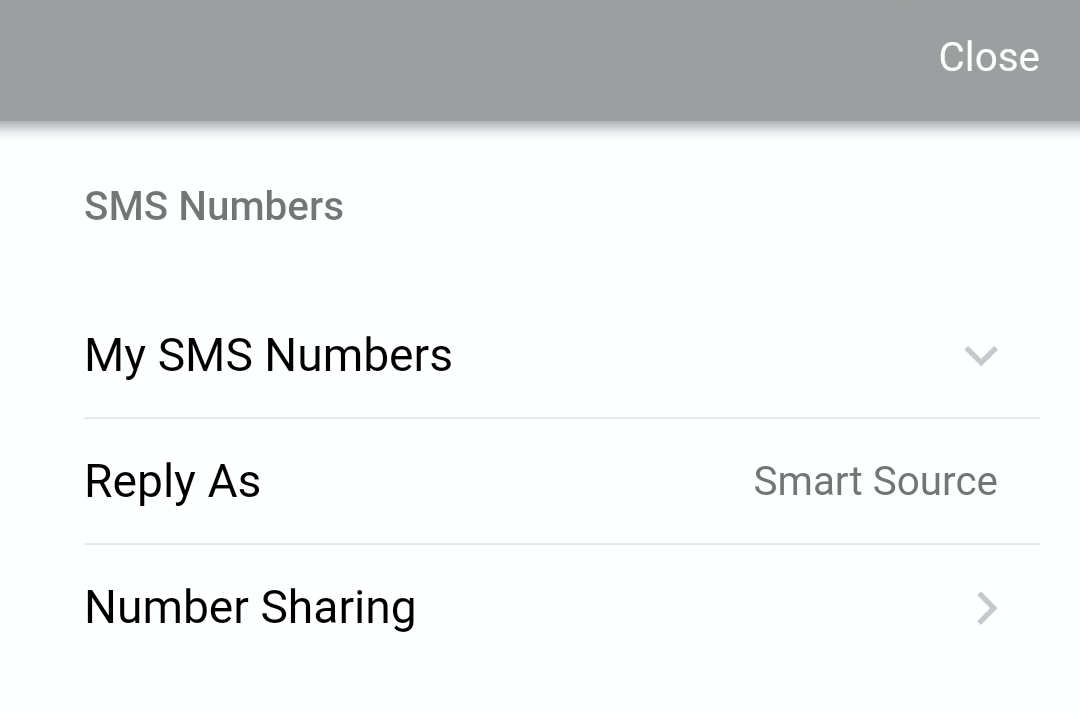
Clicking on the SMS Numbers will open a dialog that contains the settings for your SMS Phone Number. More info on this section can be found in the SMS Numbers Page article.
Note: If this is not visible on your ReachUC Mobility app please contact your service provider for details.
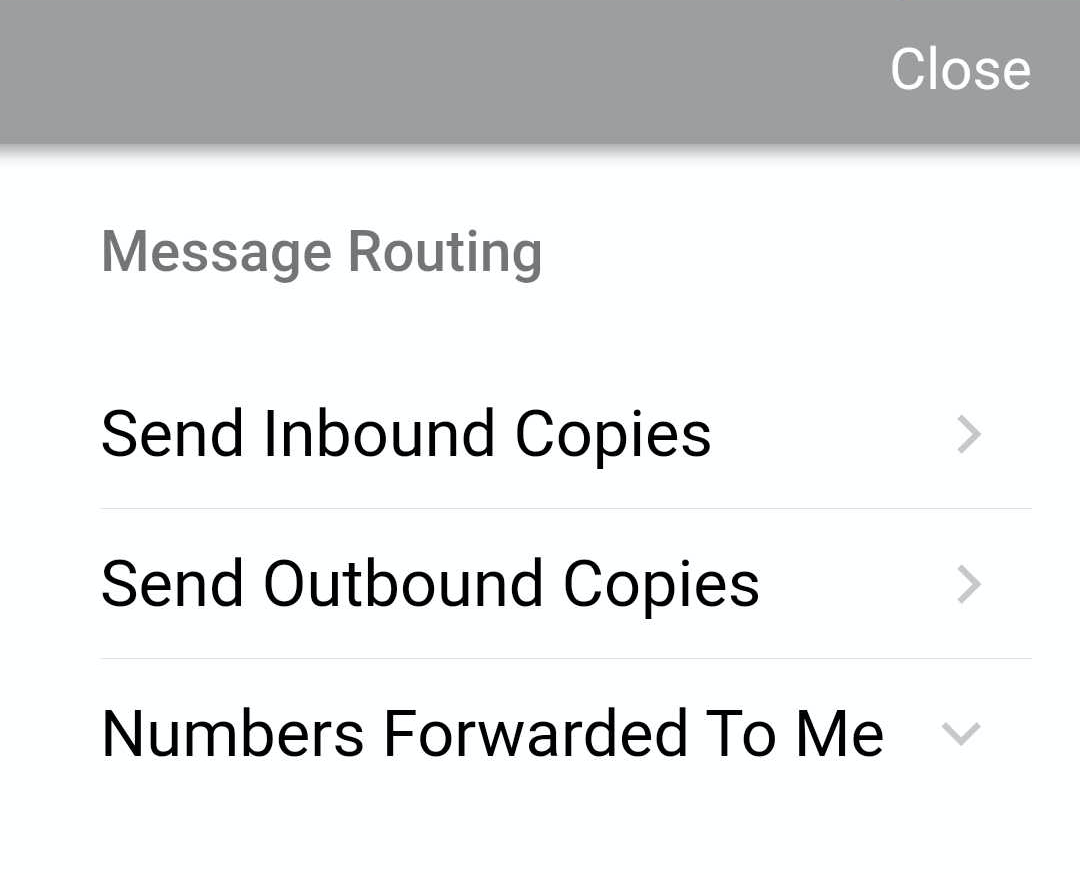
Clicking on the Message Routing link will open a dialog that contains the settings for how incoming and outgoing messages are routed plus info on who has selected your number to receive copies of messages that they receive. To know more go to Message Routing Page.
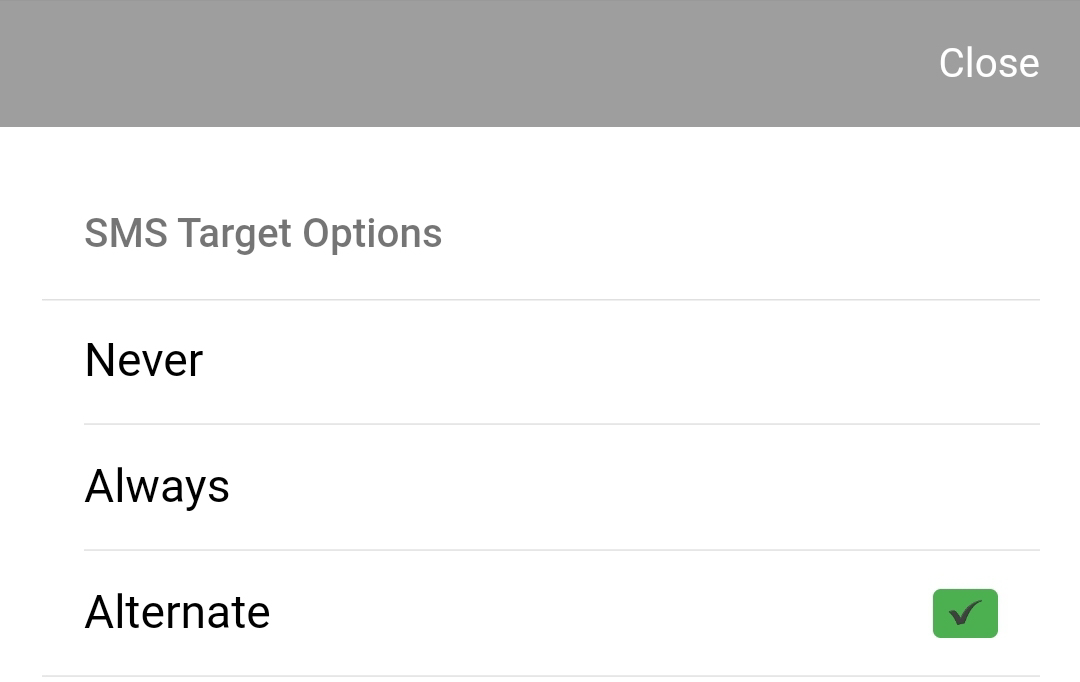
Clicking on the Show SMS Target link will open the dialog for you to change your Show SMS Target setting. Information regarding this feature can be found in the Show SMS Target Feature article.
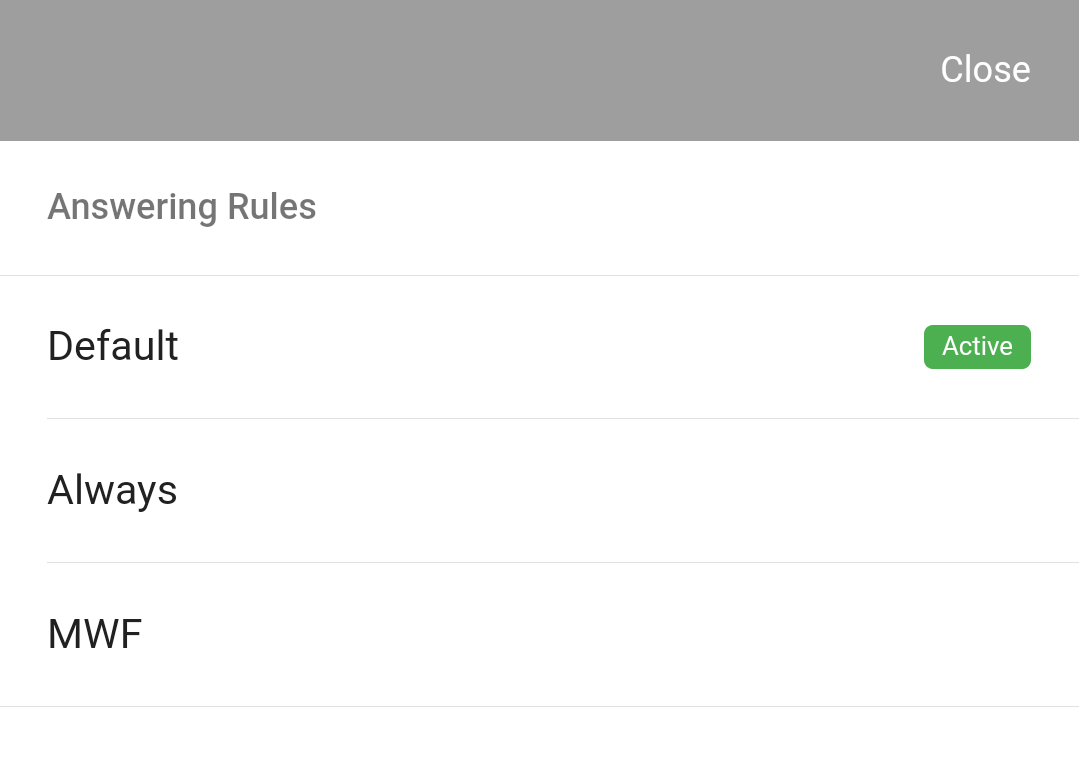
Clicking on the Answering Rule line will reveal all your answering rules with your current answering rule marked as Active. You can change your active answering rule by clicking on another answering rule shown.
Note: Answering Rules options shown will only be those that include the current time and date as of choosing.
Clicking on the Change Password line will open up a screen to let you change your PBX password.

Diagnostics
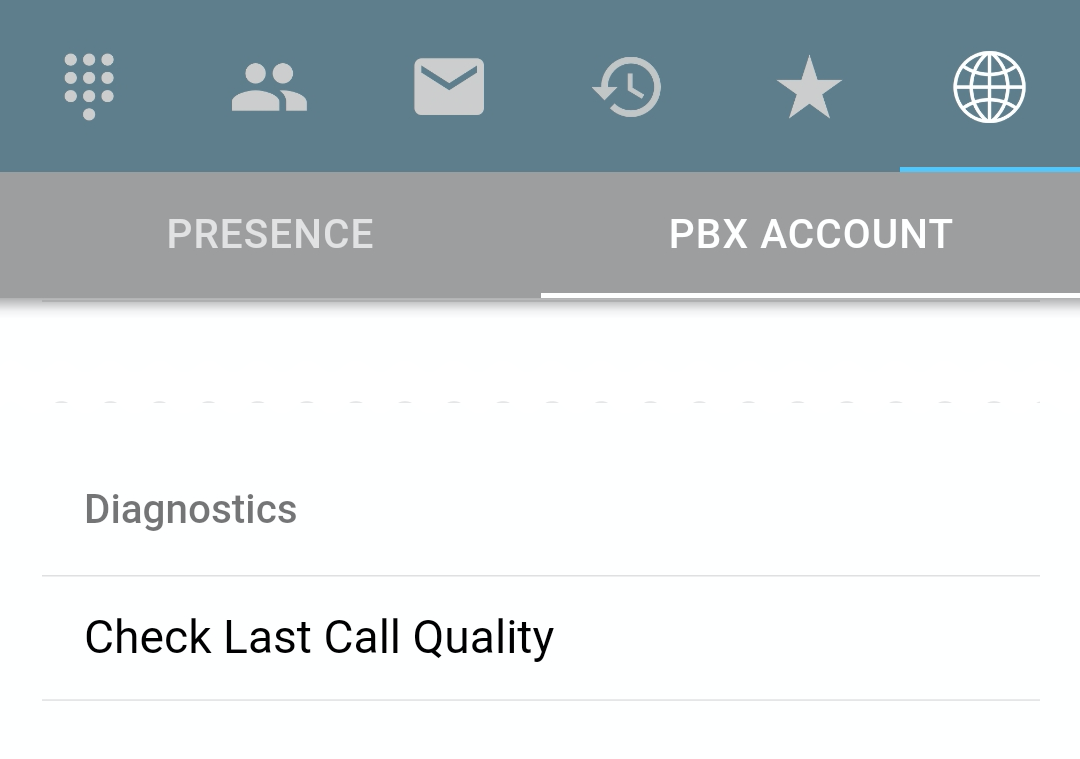
This section contains the link to the Last Call Quality feature, which can help you send a report together diagnostic data concerning your latest call through the ReachUC Mobility app. To know how this feature works go to the Last Call Quality Feature article.
Downloads
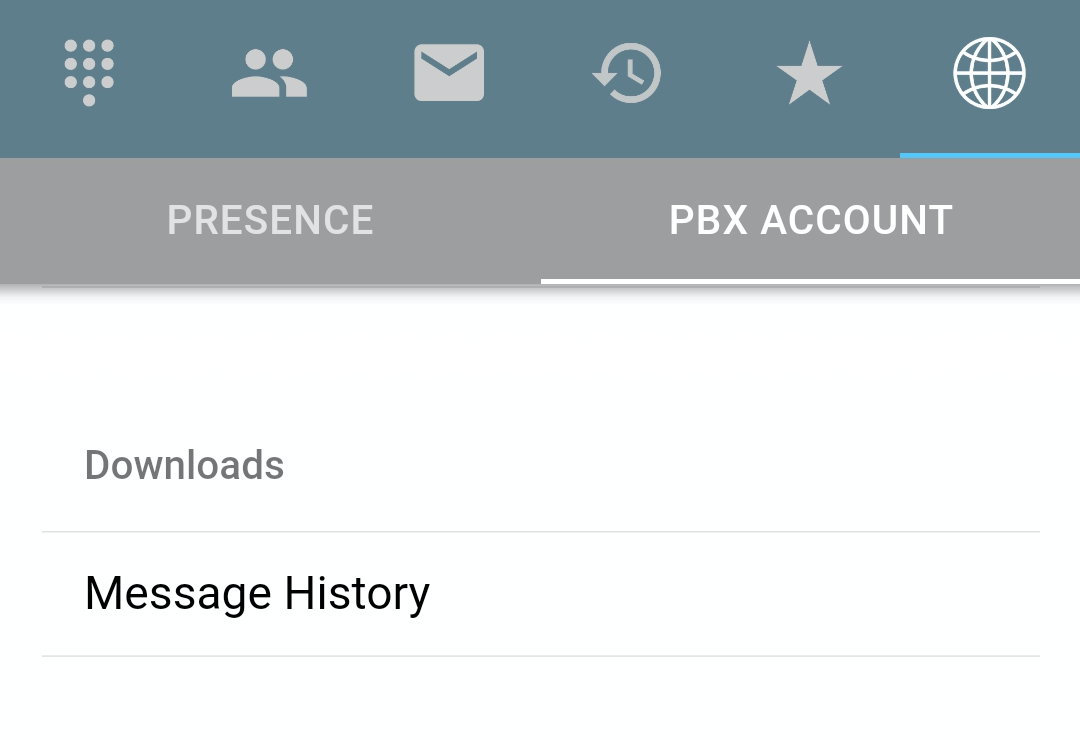
This section contains the link to the feature which allows you to download your message history for all numbers or for a specific number connected to your ReachUC user. You may download up to 6 months. To know how to use this feature go to the Download Message History article.